GitBucket
For a scientific paper I will have to write in school, I am writing a traffic simulator
|
|
|||
|---|---|---|---|
| Assets | 1 year ago | ||
| Packages | 3 years ago | ||
| ProjectSettings | 2 years ago | ||
| .gitignore | 2 years ago | ||
| README.md | 1 year ago | ||
| screenshot.PNG | 1 year ago | ||
Traffic simulator
For school, I have to write a (pseudo-) scientific paper with the theme 'everyday physics'. I chose to focus on the topic of urban interchanges and the effects different variables might have on their effectivenes. Because a traditional experiment would be far too expensive / much work, I created this simulation to do my research.
This project was made using the unity game engine to simplify its visualization.
Usage:
From the unity editor
There are a number of buttons on the UI to edit the current road network with the pencil allowing you to create roads, the trashcan allows you to remove them and the traffic light is used to set up traffic lights in the simulation. There are also buttons to quickly save and load road networks as well as a photograph mode which lets you view the roads from directly above.
From the command line
Before using the simulator from the commandline, first build the project from the Unity editor. Select appropriate settings for your platform and ensure the Sample scene is the default scene.
Then, to run the simulation:
.\Traffic.exe.lnk -i {inputFilePath} -o {outputFilePath} -green {greenTime(x)} -red {redTime(x)} -f {frequency} -t {time} -batchmode -nographics
Explaination of command line arguments
The -batchmode and -nographics options are used to run the simulation without rendering all the graphics to improve performance. This allows you to run one simulation for every thread your machine has to offer.
The input file path passed by -i should point to a file that was exported using the graphical editor and contains a road network.
The output file path passed by -o is where the resulting data will be stored. This will be a JSON-file of the format:
{ "travelTimes": [0.0, 1.0, <...>] }
The travel times are given in seconds. Should a car fail to spawn begcause its spot is already taken, a value of 0 will be added to the travel times.
The green and red times passed using -green and -red respectively will specify the behaviour of traffic lights.
A traffic light will be on for -green seconds when its phase starts. After the phase has elapsed, all traffic lights will be red for -red seconds and after this, the nex phase will commencec
Cars are spawned at roughly -f Hz at every spawn node. This frequency is subject to random variance by +- 10% to ensure some noise in the data.
The simulation is run for -t seconds. After this, the output file will be written and the programm is ended automatically.
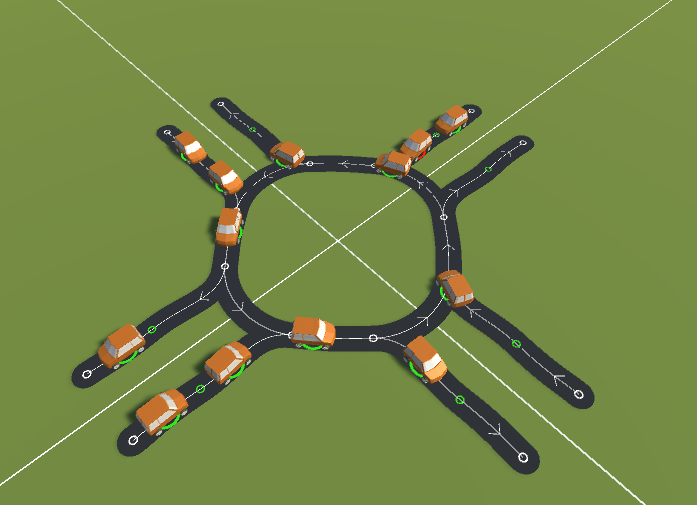
Screenshot